Google’s Gemini AI has quickly become one of the most popular creative tools, allowing users to generate images, edit photos, and enhance visuals using artificial intelligence. But with these advanced features also comes an important concern — privacy. Many users now wonder how to delete their photos from Gemini AI and stop the app from using or storing personal images. If you’ve ever uploaded a photo for AI editing or experimentation and want it removed, here’s a simple, step-by-step guide to help you keep your data safe.
Step 1: Open Gemini and Sign In
Start by opening the Gemini app or visiting the Gemini AI page through your browser. Make sure you’re signed in with the same Google account that you used when uploading your photos. This ensures that you can access and manage the exact data linked to your activity.
Step 2: Go to Your Data and Privacy Settings
Tap on your profile icon or settings gear in the upper corner of the interface. From the menu, select “Your Data and Privacy” or “Manage Account.” This section gives you control over the information Gemini stores, including uploaded content, queries, and activity logs.
Step 3: Turn Off Gemini Apps Activity
In the privacy settings, look for an option labeled “Gemini Apps Activity.” This toggle determines whether Gemini can save and use your uploaded images, voice inputs, or chats for improving AI performance. Simply turn this feature off. Once disabled, Gemini will stop collecting new data and storing your future uploads.
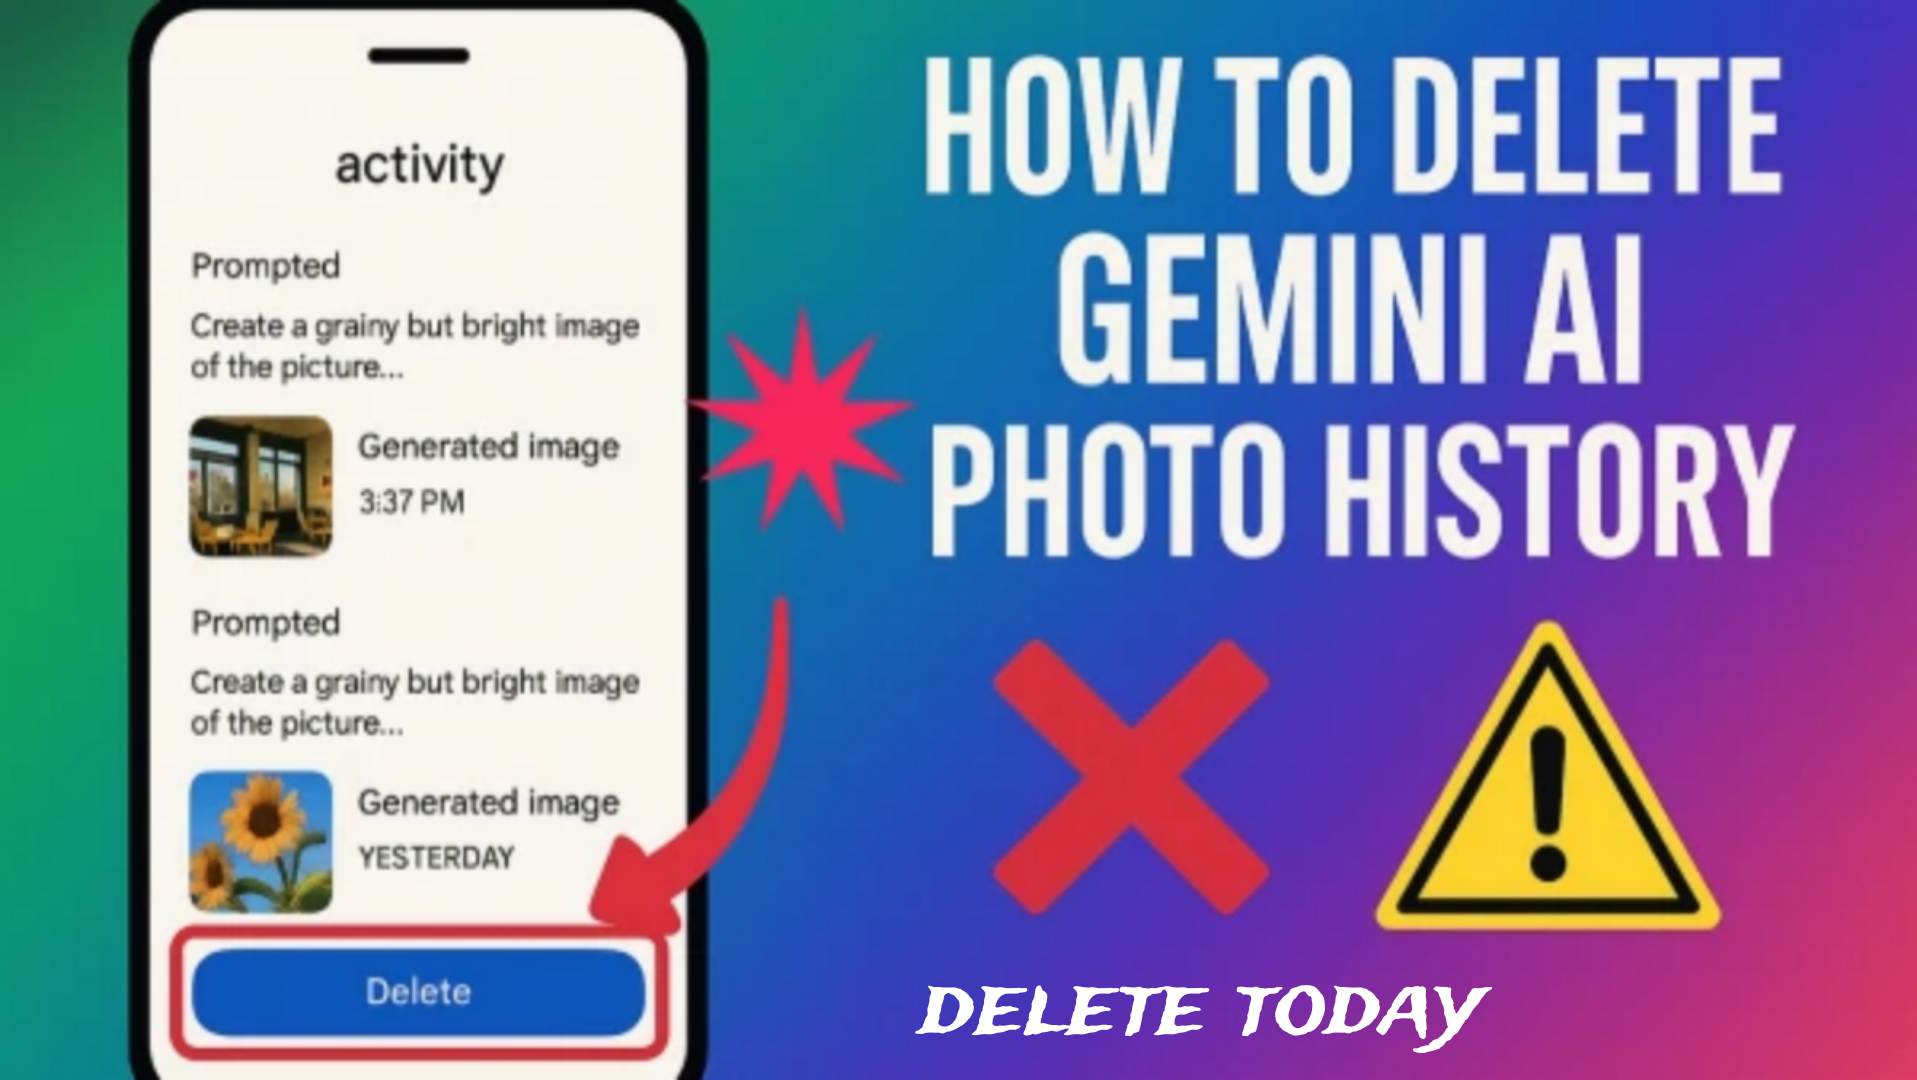
Step 4: Delete Past Activity and Uploaded Photos
After turning off Gemini activity, scroll down to find the “Delete Past Activity” or “Manage Data” option. Here you can erase previously uploaded photos, chat data, or image generation history. Select “Delete All” or “Delete Selected Activity” to permanently remove your data from Gemini’s stored records. This step ensures your older photos are no longer accessible through your account.
Step 5: Review Gemini Usage in Google Photos
If you’ve used Gemini tools connected with Google Photos, check the settings in the Google Photos app as well. Look for sections related to AI, face grouping, or memory creation. Disable Gemini access and remove any AI-generated enhancements that use your personal photos. This helps you maintain privacy across all connected Google services.
Step 6: Confirm Deletion and Recheck After Some Time
Once you’ve deleted the photos and turned off tracking, Gemini may take some time to process the request. Deletion usually happens automatically within a short period, but it’s a good idea to revisit your privacy settings after a few days to confirm that your data and images are no longer stored.
Managing privacy in AI tools is essential because uploaded images can sometimes be analyzed to train algorithms or improve user experience. By deleting your data and disabling collection features, you’re ensuring that your personal photos remain private and secure.
Extra Tips for Better Control
Avoid uploading sensitive or private images for AI testing or editing. Always read the permission pop-up before granting access to your gallery or files. Regularly review your account’s “Data & Personalization” settings to see if any Gemini-related features have been re-enabled. It’s also a good habit to log out of Gemini when not in use, especially if you share your device.
Taking these six easy steps gives you complete control over your digital privacy. With Gemini AI continuing to evolve, being aware of how to manage your personal data ensures that your creative experience remains secure, transparent, and worry-free.
